Switching Crafts

If you’re like me, you enjoy doing more than one kind of craft. In the winter, I get busy with yarn and sewing crafts. In the summer, I do more outdoor projects. But all year long, I love doing papercrafts. It’s the only kind of crafting that I’ll find classes to take that help me learn how to do it better.

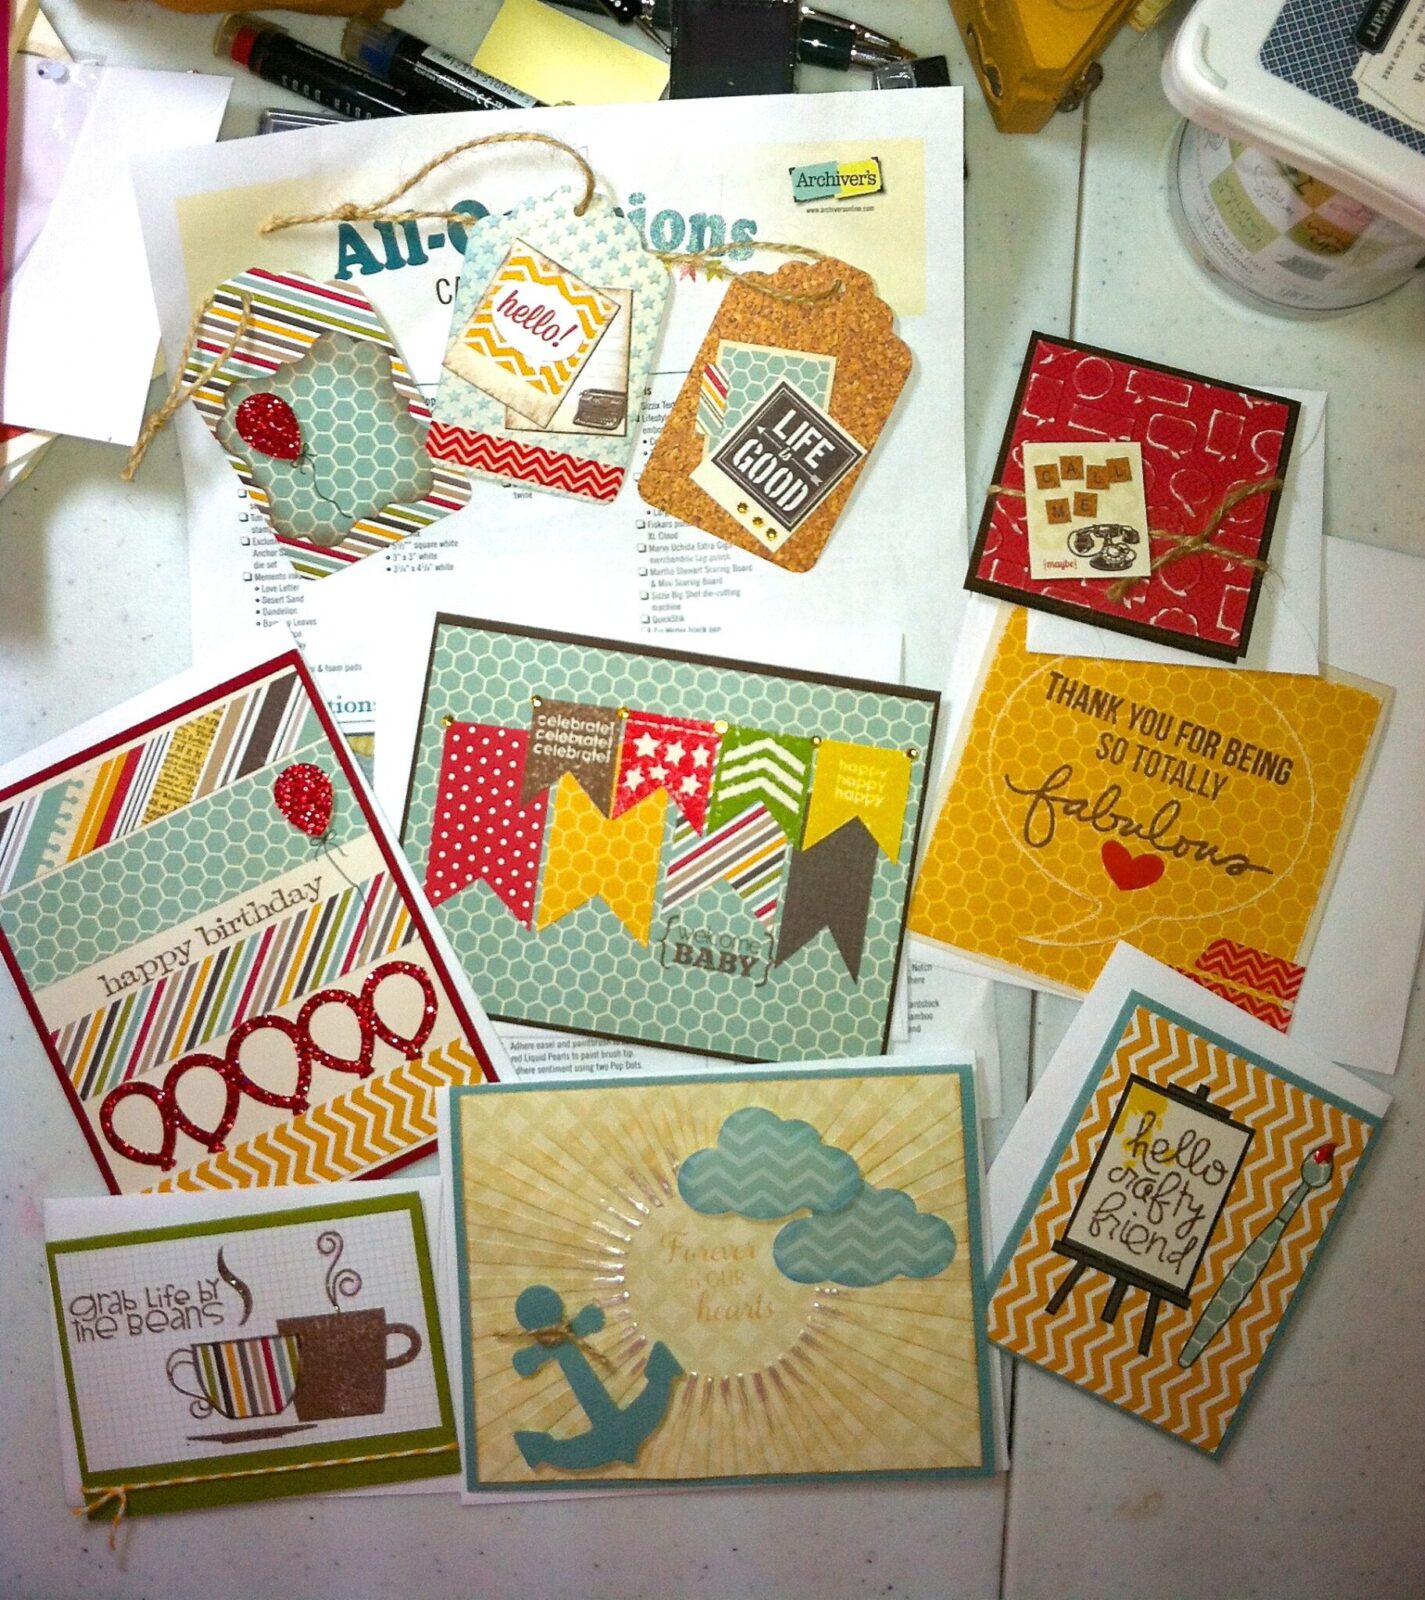
Last week, I went to an all-occasion card-making class. Here’s a selection of the cards I made there:

archivers cards

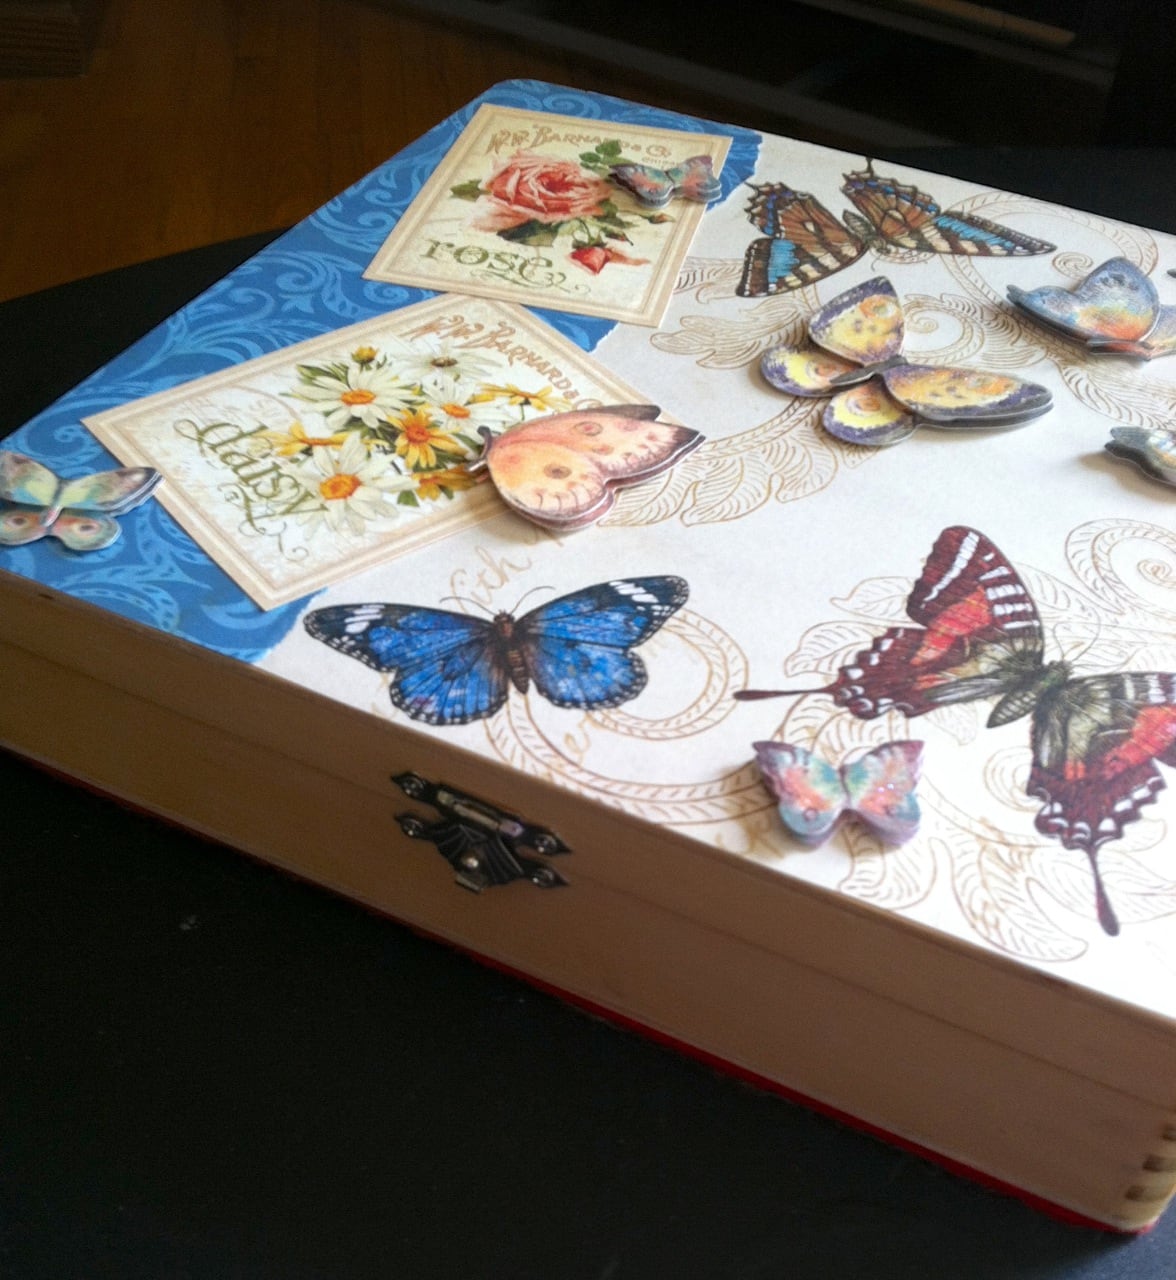
I’ve been on a card-making craze ever since. I decided to make several different kinds of cards and then create a box for the set as a gift for my stepmother. It all started with butterflies and went on from there. The box is a pre-made wooden one I bought at Michael’s. I covered the bottom with red felt, so it won’t scratch any surfaces. Then I cut paper pieces for the top and some flower cutouts from the Secret Garden paper collection, and matching paper for the inside bottom. On the top I attached some 3-D butterflies. Here’s a look at how it turned out:

butterfly box

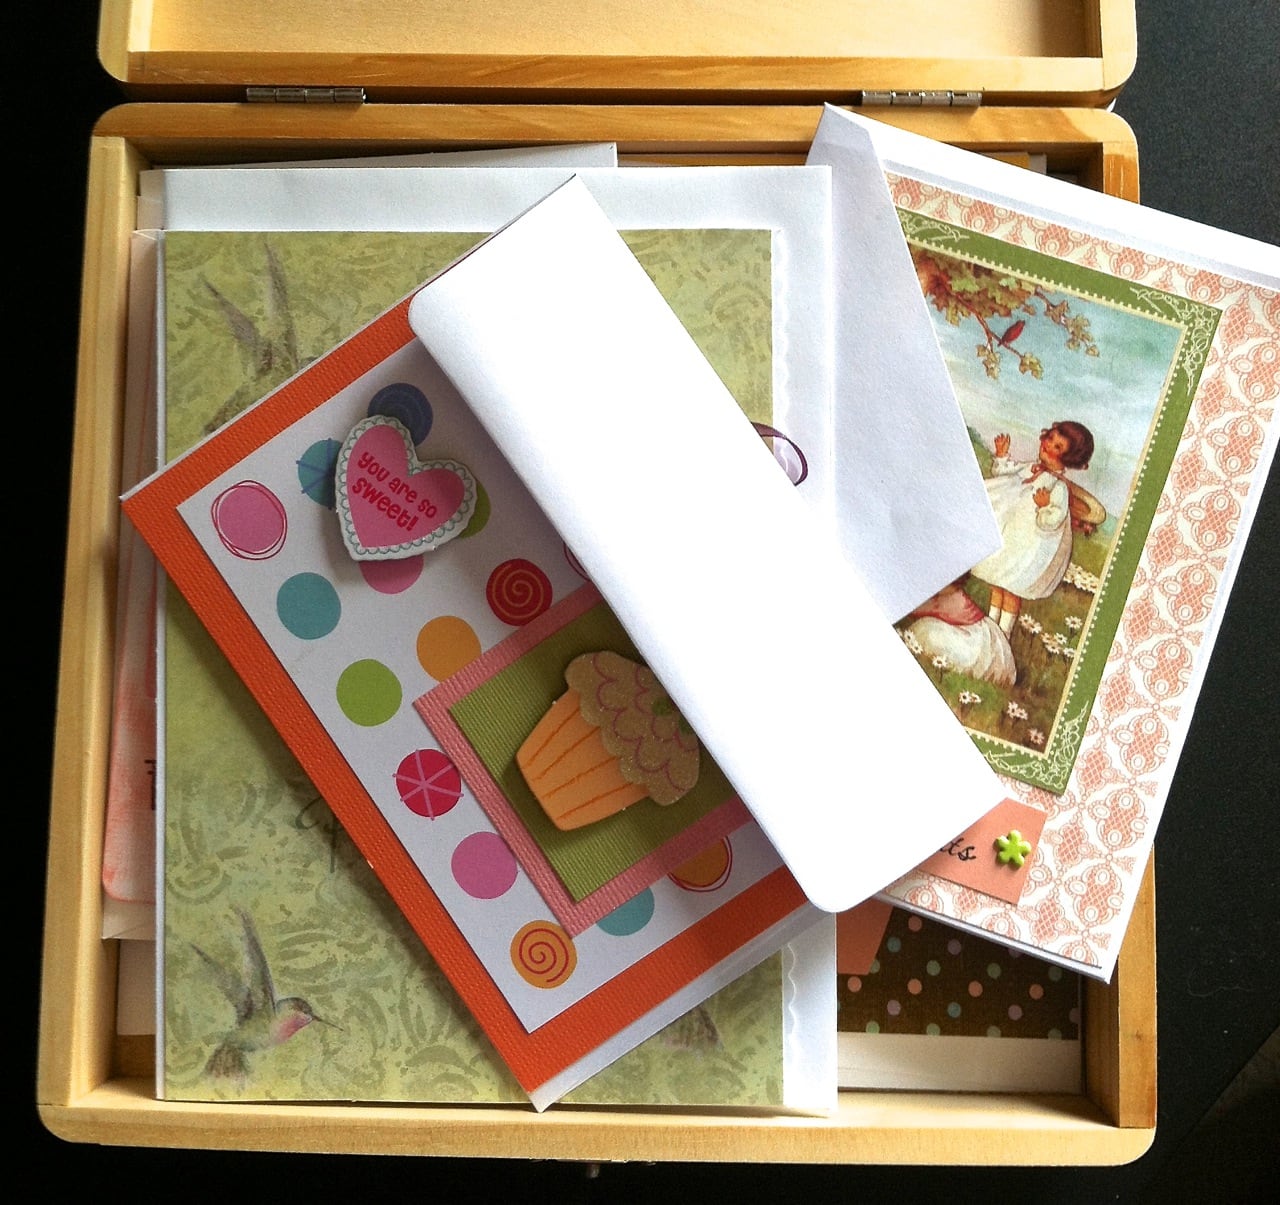
Then I made 10 cards to fill the box. The cards are of all sizes and shapes and themes. I wanted her to have lots to choose from. Here are two of them:

tulips and daisies


When the box was full, it was ready to be given. Dear Carol loved it! I think I’ll be doing this more often for friends and family as gifts. Now she’ll have some cards to choose from when she needs to share her wishes for a happy birthday, a thank you, a thinking of you, or a note of sympathy.

box o cards

I’ll be posting lots more card-making and paper-crafting ideas over the next few weeks. Check back often for some pretty photos—and some step-by-step “how to” directions!

Super-Easy Pet Cushion Project

We have a new member of the household. His name is Kirby—after tossing around dozens of names and circling back to the one that really describes what he does best, sucking up stuff on the floor and making it disappear. He’s a Pekingese and an Easter baby. Yep, the Easter bunny brought this little fellow on April 8. (Which just happens to be MY BIRTHDAY, too, and was too much of a cosmic coincidence for me to ignore.) Having a little pocket pet offers all kinds of crafting opportunities, including the creation of costumes and outfits that he’d be mortified to wear if he had just an ounce of self-awareness. In due time, my little puppy, in due time.

I’m starting with more basic projects, however. He’s being crate-trained, as most household dogs are, and I can’t stand the thought of his little puppy underparts lying on the cold, hard, plastic, cookie-sheet-shaped, slide-out base of the cage. I also don’t want to give up any of my good towels. Here’s a chance to use my crafty brain to cook up something simple, yet wonderful.

I scavenge through the house, looking in drawers, closets, and my sewing area. Voilà! I spy some oldish pillowcases whose matching sheets have long since been used for dust covers in the garage. A little feminine, yes, but he’s a modern pup—it’s all about recycling. I take the first pillowcase to my sewing station, flatten it on my cutting board, and unroll a batch of batting. Using the pillowcase as my pattern, I cut a folded (doubled) piece of batting about an inch smaller around the edges than the pillowcase. Then I insert the doubled piece inside and pin the four layers flat. Using a larger stitch than normal, but not a full basting stitch, I sew around the perimeter of the pillowcase, securing the batting.

That’s it! All done! It is the perfect size to fit inside the doggie crate, and it’s pretty, cushiony, and so washable. I’ll make 3 or 4 so I can rotate them between wash days. Kirby doesn’t even mind the darling little ruffle on the end. See? He’s just happy his owner is such a crafty lady.


Crafting for Christmas … in July

If you’ve been in a craft store lately, you know that Christmas isn’t really that far away. Never mind that it’s 95 degrees outside and most of the country is dry as a bowl of Cheerios sans milk. (Really, now do toddlers eat those things dry?!) This year has been warmer and dryer than any year in recent memory, so it’s begun to feel like the title of one of those drippy teen romance novels:The Summer of Forever, or whatever. And then I saw the aisles at Hobby Lobby and JoAnn’s and Michael’s. Aisles that twinkled with red, green, and gold glitter. Santas and snowmen greeted me with crinkly eyes and fat-cheeked smiles. They reminded me that even this summer will come to an end.

My first reaction is horror. How can they even think about Christmas this early? Then I start to think about it. And realize, like the merchandisers of craft stores, that I should really get started on projects that I intend to make as Christmas gifts this year.

Granted, those kinds of gifts are fewer than they used to be. When I had small children (all boys, by the way), I made beautiful, heirloom-worthy things. My oldest son’s hand-stitched crewel embroidery stocking was a masterpiece. Unfortunately, it now resides with my ex-husband who may or may not treasure it as I would. Some part of me wants to go all ninja-like and sneak in to steal this one-of-a-kind work of art. Honestly, I learned stitches on that thing that I had never done before nor have done since. I *will* post a photo of it on here someday. Just don’t ask how I got it.

Nowadays I satisfy my crafting urges by making smaller things: dishcloths, dishcloths, earrings, dishcloths, bracelets, hot pads that can double as dishcloths. I go for quantity over quality now. That Christmas stocking took me more than 80 hours to finish, I’m sure. Now I can whip up a dishcloth in about 15 minutes. It’s a good one, too, don’t get me wrong. Just look:

Ask yourself honestly, would you give away something that took you much longer than 15 minutes to make if you knew it was going to be submerged in dishwater for wiping peanut butter or pasta sauce off a stack of plates? I rest my case. (The one on the right here is especially good for cleaning up grape jam, by the way.)

How many have I made for Christmas 2012 so far? At last count, about 25.

Anybody want a dishcloth?


Oh, the hoarders, the hoarders!

When I watched a couple of episodes of Hoarders, I had to look away whenever one of the hoarders said, “No, I have to keep that. I might need it,” or “Oh, I forgot I had that. I can’t throw that away.” How many times have I heard those phrases inside my own head while cleaning out drawers, shelves, or boxes? Although the show has not scared me neat, it definitely makes me pay attention to what I tell myself whenever I look at all my “stuff.”

My stuff tends to fall into two large groups: books and craft supplies. I am not a shoe collector, nor do I collect any particular collectibles (both of which my husband is very happy about). The problems I run into with the books and crafts are the niggling thoughts that someday I might read that book again, or I might want to use that 6″ piece of ribbon for a card someday. And I know why I don’t just give some of my books to, say, Goodwill or some other secondhand service. I want the next owner to care as much about that book as I did. I don’t want it to languish on a shelf or in a pile somewhere, getting old and ratty and musty. (UPDATE: I just gave away two large bags of books to the local library. Then I went out and got more books. Oh, well.)

The craft items are hard to give up because they’re pretty or they’re part of a kit I have almost finished or I had this idea of a new craft project…the list of excuses goes on and on. The main reason I have so much stuff (and such a variety) is that I love all kinds of crafts. I love to crochet (yarn, needles, books, pamphlets, more yarn, crochet thread); I love to sew by hand (thread, needles, fabric, felt, buttons buttons buttons, rickrack, ribbon); I sometimes use a sewing machine (thread, fabric, patterns, buttons buttons buttons, interfacing, trims, zippers); I used to cross stitch (floss, fabric, needles, floss, floss, books) but my eyes don’t let me enjoy that like I used to. Don’t even get me started on all the paper crafts (paper of all kinds, colors, patterns, sizes; rubber stamps; ink; colored pencils; markers; paints; embossers; scissors; punches).

Why do I feel like I need to join a recovery/support group after writing all this?

The truth is, I’m really good at this stuff. And in life, it feels good to be good at something. So if I have to put up with feeling guilty for having too much just so the stuff will be there when I want to express my creativity in some crafty fashion, then I guess I need to make peace with the piles o’ supplies.

But I’ll let you know if I decide to finally have that craft-themed garage sale.


Once a Teacher…

always a teacher, at least in my heart. I think that’s true of so many of us who spent a few years in the classroom but moved on to other careers or responsibilities, like raising our own kids. It’s been more than (ahem, garble, mutter) years since I stood at the doorway, greeting students on the first day of school. I was as nervous and excited as they were, maybe more so. But none of us looked nervous. No, that would have been so uncool—and a huge mistake for me. To teach a herd of teenagers, one has to be confident, a bit aloof even, and definitely able to deliver “the look” with deadly accuracy. I think it took me about 4 years to accomplish all that.

I loved teaching, loved the teenagers (really!), loved the subject matter (writing, literature, and American history), and loved the growth I saw from their freshmen through senior years. I didn’t like the drama, but that mostly came from other teachers and the administration. Honestly. Why did I leave teaching? Long story…that ended in Florida and began a new chapter working with children’s and YA literature. It’s all been very good.

So, what’s my craft du jour that dovetails with this post? How about something simple you can make for either your teen student or a teacher buddy? It’s fresh, functional, and fun!

  All you need is a small terracotta pot (with bottom), a bit of Styrofoam, a silk flower, and some school supplies. I used green paper clips, green pencil-top erasers, pencils, highlighter, scissors, ruler, Post-It notes, stickers, glue stick, red marking pencil, and pencil sharpener. Glue the pot to its bottom, sliding it toward the back so you can place stuff in front of the pot. Then shove the Styrofoam down into the pot. Glue a wooden clothespin to the back of the pot so it can hold notes and sticker sheets. Push down into the Styrofoam the pencils (sharpened is easier), highlighter, glue stick, scissors, ruler, and flower. Put a small Post-Note pad and sharpener in the bottom . Sprinkle the green paper clips and erasers around the objects, covering the Styrofoam. Voila! A desktop delight for teens and teachers alike.