Sending Greetings to Kids: Cards or Books?

It’s been a couple of weeks since I’ve posted, but that’s because there’s been so much good stuff going on. I did some editing assignments, writing assignments, and crocheting for the season. (I usually donate hats and scarves to the Salvation Army for their winter clothing drive.) And the BIG event was my grandson’s fifth birthday! 
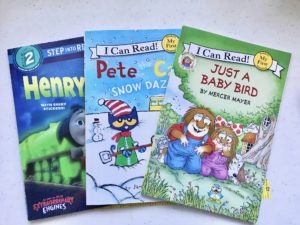
As I was wrapping his gifts, I realized that I had forgotten to buy him a card. Oh no! And that made me think: Why do we all need to give him cards when he’s probably never going to look at them again? What can I do that is different and useful? I spotted, among my gifts, a leveled reader. You know, one of those 6 x 9 paperbacks with a big 1 or 2 or 3 (and even higher) in a circle on the front. 
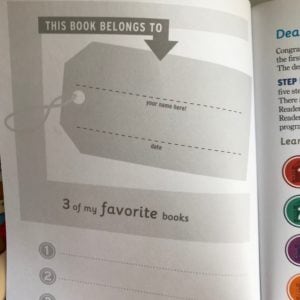
I opened the book, and right there on the inside cover was a place to write a greeting, along with Matthew’s name. It’s almost like a birthday card, right? I signed it “Happy 5th birthday to Matthew. Love, Grammy and Grandpa.” Now, where’s an envelope that will work?

Nothing fit! Like Goldilocks, I found some that were too small or too large or too thick—but none that were just right. Well, challenge accepted!

Follow along with me and you’ll see how to make a lined envelope perfect for holding—and MAILING—a leveled reader instead of a card. (Or include a card. There’s room. Also: most greeting cards these days are going for $3.95 to $5.95 apiece! Sheesh! These leveled readers are only $3.99 or $4.99, and they won’t get tossed in the trash. Genius, right?)

Step One

Get a 9½” x 13″ envelope that opens at the top (not the side, like some do). I’m using white, but if you prefer the standard yellow, that’s fine.

Step Two

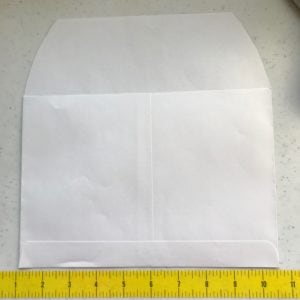
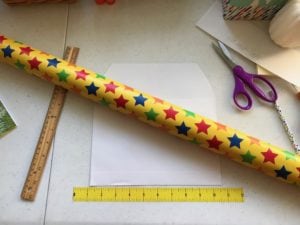
Measure from the bottom 9½” and mark with a pencil. This will be your cutting line. Yes, you’ll be cutting off the sealer at the top. Now you’ll have a 9½” x 9½” square.


Step Three

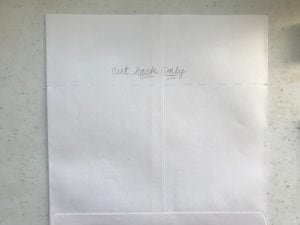
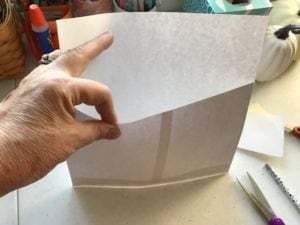
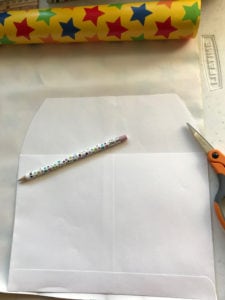
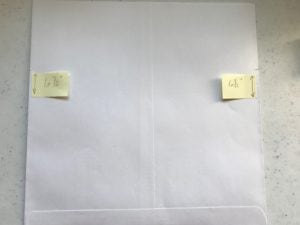
Measure from the bottom up 6½” and draw a line for cutting. But DO NOT CUT it yet.
Step Four

You will only cut the BACK SIDE ONLY of the envelope this time. This is how you get the envelope flap on the front.


Step Five

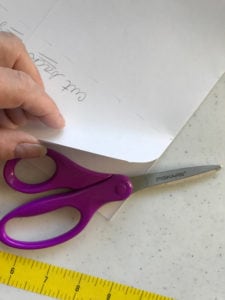
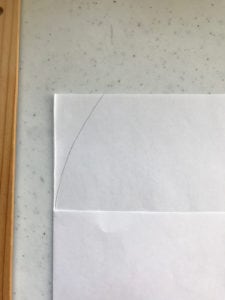
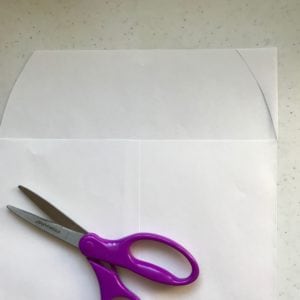
Next you will cut curves on the outer edges of the envelope flap. Try to make these as even as you can. I drew one side and cut it, then used the cut off piece to show me where to draw the other curve. It’s kind of like geometry, but fun!


Step Six

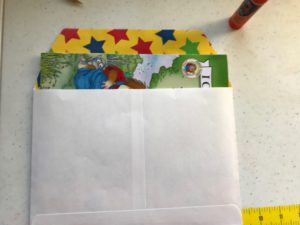
Just a quick check and you’ll see that one book fits perfectly inside! You can stop here if you want, but for some added pizzazz, let’s keep going. We’re going to make a bright, happy liner for the envelope next.
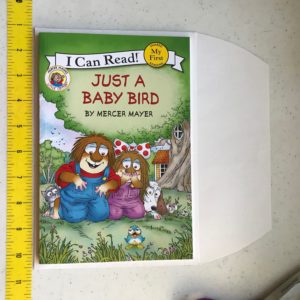
Step Seven

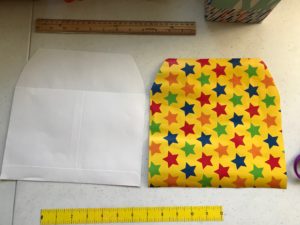
To make a liner, you can use any light- to normal-weight decorative paper. In this case, I’m using gift wrapping paper. (It can be tricky if it’s from a roll, but not difficult.) Start by cutting a piece by using your envelope as a pattern. Cut INSIDE your lines so it will fit in the envelope.


Step Eight

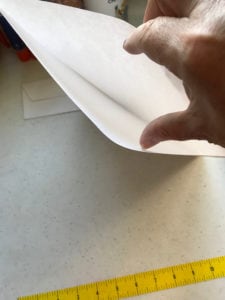
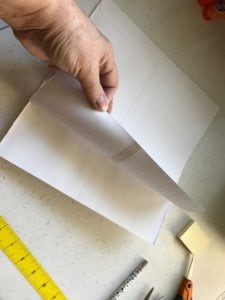
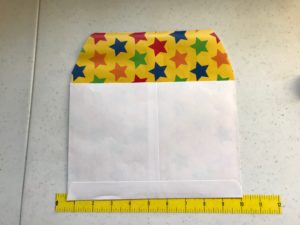
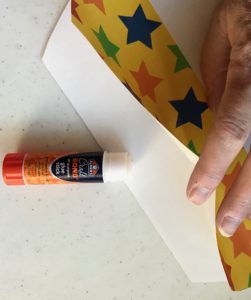
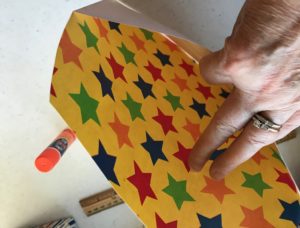
Slide the liner into the envelope so it is face-out as shown below. Then use a glue stick or other non-liquidy glue to adhere the liner to the top of the flap.


Step Nine

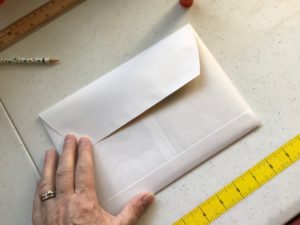
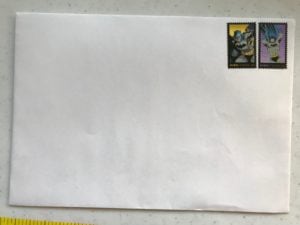
Fold over the flap. Before mailing, you can seal the envelope using a glue stick, Scotch tape, or washi tape. Just make sure it’s sealed well. Insert the book and add postage if you’re mailing it. Two first-class stamps will get it where it’s going in the U.S. 

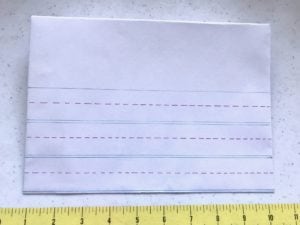
Add some envelope art or stickers to the front if you like. I made one recently that looks like notebook paper. I’ll add the name and address in big, round print, just like in kindergarten!


Other Fun Ideas

Don’t stop here. Think of ways you can share books and the love of reading. Adapt the envelope for 8″ x 8″ readers or Little Golden Books or other formats. Cards are nice, but books are better. Or throw a card in with the book. Add bookmarks, sticker sheets, trading cards, etc. Your little ones will be thrilled to get mail—and even more excited to have a gift they can keep for their very own.

Happy reading and crafting, my friends.


Crochet Lessons from Pam Muñoz Ryan’s Esperanza Rising

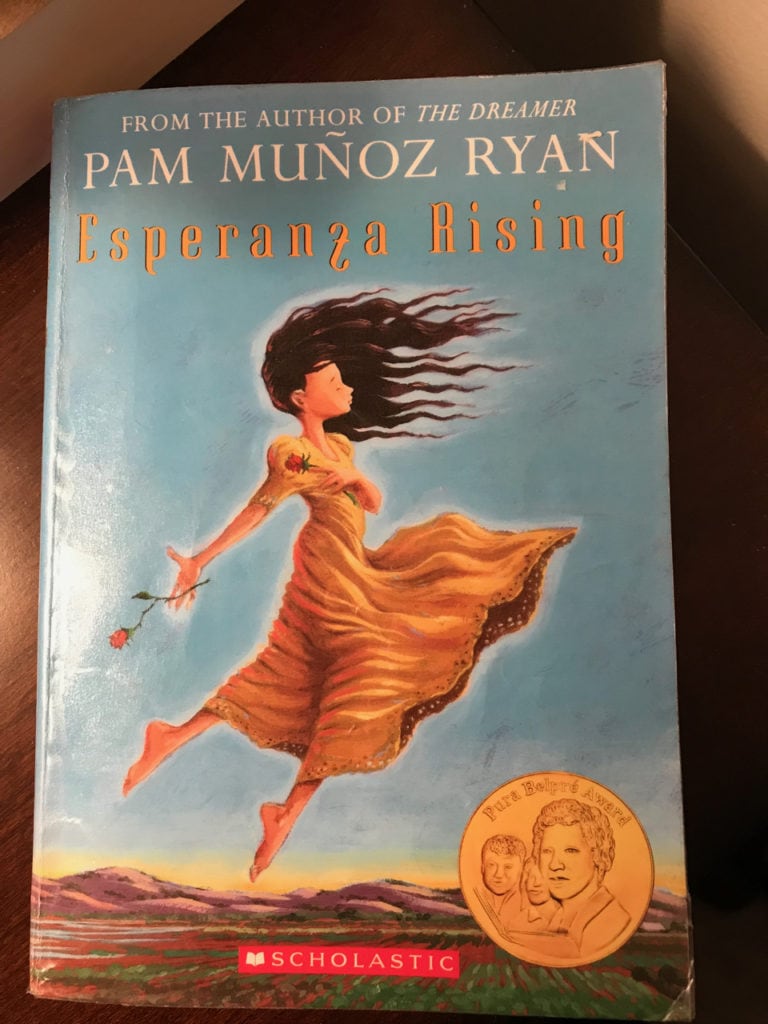
[Esperanza] watched the silver crochet needle dance back and forth in her grandmother’s hand. When a strand of hair fell into her lap, Abuelita picked it up and held it against the yarn and stitched it into the blanket.

“Esperanza, in this way my love and good wishes will be in the blanket forever. Now watch. Ten stitches up to the top of the mountain. Add one stitch. Nine stitches down to the bottom of the valley. Skip one.”

Esperanza picked up her own crochet needle and copied Abuelita’s movements and then looked at her own crocheting. The tops of her mountains were lopsided and the bottoms of the valleys were all bunched up.

Abuelita smiled, reached over, and pulled the yarn, unravelling all of Esperanza’s rows. “Do not be afraid to start over,” she said.

Esperanza Rising by Pam Muñoz Ryan, Scholastic paperback edition, ISBN 978-0-439-12042-5, 2007, pp. 14–15.

A Few Opening Thoughts

If you haven’t read this book yet, let me tell you that it belongs on your TBR list. Go ahead. Write it down. I’ll wait.

The clamor over immigration these days is not as new as we want to believe. It’s been a hotbed issue for decades. This tale of a young Mexican girl who has to flee her home with her mother and a group of family friends for the safety of America is based on the author’s grandmother’s immigration experience. Migrant farm workers form the backbone of Ryan’s family tree. They worked hard to make a home for their children, grandchildren, and great-grandchildren. Even though the story takes place during the Great Depression decade of the 1930s, the obstacles for immigrants are still looming and scary. 

If you have a young person in your life, probably aged 10 or older, do them a favor and buy them this book. Then have a conversation about immigration. Perhaps dig up your own family history and share it. Many of us can trace our roots to an immigrant who dared to risk everything to start over in America. Now, more than ever, this conversation needs to happen. 

Crochet Lesson #1 (Lección de Ganchillo Número Uno)

Imperfections create personalization.

Those of us who work with yarn—usually as knitters or crocheters—find ourselves pick, pick, picking things out of the yarn as we stitch. It might be a piece of lint, a cat hair, or one of our own single tresses that clings to the fiber. We see that as an imperfection, an intrusion into the project that we’re working so hard to make. Pick, pick, pick.

From now on, I want to think like Abuelita. I want my strands to embrace the yarn if they fall into my work. I want to make every stitch a prayer for the person who will receive the gift I’m creating. I’ll be less worried about perfection so I can enjoy the stitches, the rows, the mountains and the valleys. Will you?

Crochet Lesson #2 (Lección de Ganchillo Número Dos)

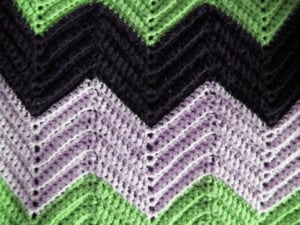
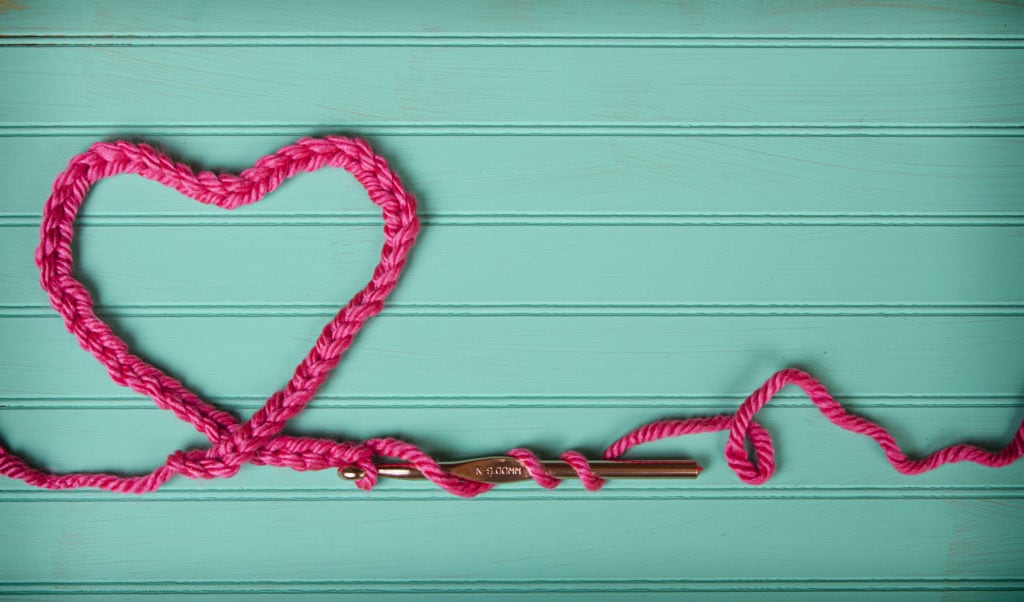
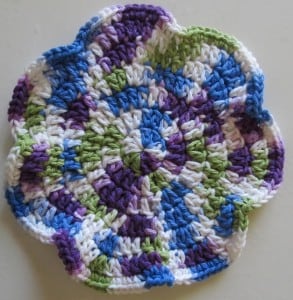
Ah, those mountains and valleys. I’ve spent time in both places—and so many years in between. I’ll bet you have, too. Those valleys are tough. They feel dark, lonely, and long. If you can envision the crochet pattern Abuelita uses (it looks exactly like the photo above), you will see that the deepest part of the valley is only one stitch away from heading up toward the mountain top. Just one stitch. Maybe that’s all you can manage some days. That one thing that moves you slightly up, changes the angle oh-so-little, but oh-so-not-in-the-deepest-part-of-the-valley. Maybe it’s taking a walk. Calling a friend. Starting a new book (read or write). Steeping a cup of tea and watching a favorite old movie. Just one little stitch. Crochet hook in, yarn over, pull through. Pull through.

Crochet Lesson #3 (Lección de Ganchillo Número Tres)

Abuelita smiled, reached over, and pulled the yarn, unravelling all of Esperanza’s rows. “Do not be afraid to start over,” she said.

I wish we could undo our mistakes as simply as pulling on a string. We can’t. However, we can try again, over and over if necessary. Here are some ways to do that:

  • Apologize sincerely when wrong.
  • Admit when we’ve made a mistake.
  • Make atonement when possible. (AA’s Twelve-Steps followers depend on this to maintain sanity and sobriety. We all would do well to practice this step, too.)
  • Not take failure to heart. 
  • Remember that everyone fails, and probably a lot more often than we realize.
  • Forgive yourself.
  • Give yourself permission to mess up, especially if it means you can take risks doing something you’ve always wanted to do.
  • Swear. Punch a pillow. Take a break. Doodle. Journal. Mow the lawn. Clean the kitchen. Do something to get the negative feelings out (don’t stuff and deny them—that will only make you depressed and even sick) and then start again when you’re ready.

Do you know someone who might be encouraged by this post? Send it to them. They don’t have to join the blog, make a comment, or do anything at all. Just receive some encouragement—especially if they’re deep in a valley right now.

Those who want to follow my blog can do so by adding your information here:


Oh, the hoarders, the hoarders!

When I watched a couple of episodes of Hoarders, I had to look away whenever one of the hoarders said, “No, I have to keep that. I might need it,” or “Oh, I forgot I had that. I can’t throw that away.” How many times have I heard those phrases inside my own head while cleaning out drawers, shelves, or boxes? Although the show has not scared me neat, it definitely makes me pay attention to what I tell myself whenever I look at all my “stuff.”

My stuff tends to fall into two large groups: books and craft supplies. I am not a shoe collector, nor do I collect any particular collectibles (both of which my husband is very happy about). The problems I run into with the books and crafts are the niggling thoughts that someday I might read that book again, or I might want to use that 6″ piece of ribbon for a card someday. And I know why I don’t just give some of my books to, say, Goodwill or some other secondhand service. I want the next owner to care as much about that book as I did. I don’t want it to languish on a shelf or in a pile somewhere, getting old and ratty and musty. (UPDATE: I just gave away two large bags of books to the local library. Then I went out and got more books. Oh, well.)

The craft items are hard to give up because they’re pretty or they’re part of a kit I have almost finished or I had this idea of a new craft project…the list of excuses goes on and on. The main reason I have so much stuff (and such a variety) is that I love all kinds of crafts. I love to crochet (yarn, needles, books, pamphlets, more yarn, crochet thread); I love to sew by hand (thread, needles, fabric, felt, buttons buttons buttons, rickrack, ribbon); I sometimes use a sewing machine (thread, fabric, patterns, buttons buttons buttons, interfacing, trims, zippers); I used to cross stitch (floss, fabric, needles, floss, floss, books) but my eyes don’t let me enjoy that like I used to. Don’t even get me started on all the paper crafts (paper of all kinds, colors, patterns, sizes; rubber stamps; ink; colored pencils; markers; paints; embossers; scissors; punches).

Why do I feel like I need to join a recovery/support group after writing all this?

The truth is, I’m really good at this stuff. And in life, it feels good to be good at something. So if I have to put up with feeling guilty for having too much just so the stuff will be there when I want to express my creativity in some crafty fashion, then I guess I need to make peace with the piles o’ supplies.

But I’ll let you know if I decide to finally have that craft-themed garage sale.